Witam
Mam mały problem z napisaniem kodu a raczej jego pewnie małą zmianą ale dopiero zaczynam zabawę z arduino.
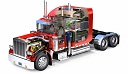
Wydrukowałem sobie projekt czołgu na silnikach korkowych nema17 o taki: http://www.thingiverse.com/thing:467807 i chciałbym sterować nim za pomocą aplikacji na telefonie z androidem a dokładnie chodzi o tą aplikację :
https://play.google.com/store/apps/deta ... controller
Posiadam arduino uno (klon) moduł bluetooth hc-05 oraz Shield sterownika L293D zasilanie samego arduino odbywa się z power banka a silników z baterii 9V.
Całość podłączyłem-wgrałem jak na tym filmie https://www.youtube.com/watch?v=2xkA5VpwYik z tym że zamiast silników DC są silniki krokowe podłączone według tego schematu http://www.14core.com/wp-content/upload ... -Motor.jpg
I tutaj mam problem co do kodu by móc tym sterować tak jak na filmie z tym że zamiast silników DC były silniki krokowe nema17 ktoś pomoże w napisaniu, zmianie tego kodu ??
Chyba że znacie jakieś inne ??
Z góry dziękuje za pomoc.
//---------------------------------------------------------------------------------------------------------------------------------------
//Basic Remote Control Car - Bill Tarpy - North East CoderDojo 17/01/2015
//Feel free to use this software as a basis for your own.
#include <SoftwareSerial.h> //the library for seial communication
#include <AFMotor.h> // the library for the Adafruit L293 Arduino Motor Shield
int incomingByte = 0; // for incoming serial data
int speed_min = 135; //the minimum "speed" the motors will turn - take it lower and motors don't turn
int speed_max = 255; //the maximum "speed" the motors will turn – you can’t put in higher
int speed_left = speed_max; // set both motors to maximum speed
int speed_right = speed_max;
//as we added a Motor Shield Library we can just use the following code to define our M1 and M2 motors and their PWM frequency
//the library takes care of all the complexity of the physical interface the Arduino uses to talk to the shield and the motor
AF_DCMotor motor_left(1, MOTOR12_1KHZ); // create motor #1, 1KHz pwm
AF_DCMotor motor_right(4, MOTOR12_1KHZ); // create motor #2, 1KHz pwm
void setup() {
Serial.begin(9600); // set up Serial library at 9600 bps - this is the speed the serial interface will work at
Serial.println("Motor test!");// display message for test purposes when connected to a serial monitor
}
void loop() {
//this is our repeating loop - that will go round and round until we switch the Arduino off
motor_left.setSpeed(speed_left); // minimum speed 135 max speed 255
motor_right.setSpeed(speed_right); // minimum speed 135 max speed 255
//first check if there is anything on the serial interface
//we are using the Arduino's default serial interface (pins 0 and 1)so no need to define these
if (Serial.available() > 0) {
// read the incoming byte:
incomingByte = Serial.read();
}
// if there is something on the serial interface it is read and assigned to incomingByte
// we then use a SWITCH (case) statement which, depending on incomingByte, does different things
// it runs the left and right motors to produce movement Forward, Backward, Left, Right or Stop
//that's all there is to it!
switch(incomingByte)
{
case 'S':
// stop all motors
{ motor_left.run(RELEASE); // stopped
motor_right.run(RELEASE); // stopped
Serial.println("Stop\n"); //display message for test purposes when connected to a serial monitor
incomingByte='*';}
break;
case 'F':
// turn it on going forward
{ motor_left.run(FORWARD);
Serial.println("Forward\n");//display message for test purposes when connected to a serial monitor
incomingByte='*';}
break;
case 'B':
// turn it on going backward
{ motor_left.run(BACKWARD);
Serial.println("Backward\n");//display message for test purposes when connected to a serial monitor
incomingByte='*';}
break;
case 'R':
// turn right
{
motor_right.run(FORWARD);
Serial.println("Rotate Right\n");//display message for test purposes
incomingByte='*';}
break;
case 'L':
// turn left
{
motor_right.run(BACKWARD);
Serial.println("Rotate Left\n");//display message for test purposes
incomingByte='*';}
break;
case '1':
// Put what you like in here - for example - change the motor speeds
{ speed_left = speed_min; // set both motors to minimum speed
speed_right = speed_min;
Serial.println("Speed 1\n");//display message for test purposes
incomingByte='*';}
break;
case '2':
// Put what you like in here - for example - turn on some LED lights on the car
{
Serial.println("Lights on\n");//display message for test purposes
//why not use the motor sheild's spre motors - M3 and M4 - to turn lights on and off
//you would need to define M3/4 in your program setup, and a few extra veriables to hold values
//then FORWARD and BACKWARD would send a voltage one way then the other through the M3 and M4 terminals as you require
incomingByte='*';}
break;
}
}
//-------------------------------------------------------------------------------------------------------
sterowanie silnikami krokowymi przez bluetooth android/arduino
-
jagus

- Kierowca
- Posty: 8
- Rejestracja: 28 sie 2016, 13:09
-
Sławek

- Site Admin
- Posty: 14533
- Rejestracja: 21 gru 2011, 22:12
- Has thanked: 15 times
- Been thanked: 22 times
Re: sterowanie silnikami krokowymi przez bluetooth android/arduino
Nie da się sterować silnikami krokowymi jak silnikami DC. Ten sketch jest pod L293 a to zwykły driver pod silniki DC, to sterowania silnikami krokowymi potrzebujesz specjalne drivery, np. A4988, DRV8825 itp.
Pozdr
Pozdr
-
jagus
- Kierowca
- Posty: 8
- Rejestracja: 28 sie 2016, 13:09
Re: sterowanie silnikami krokowymi przez bluetooth android/arduino
Kolego obawiam się że nie masz racji ten shield do arduino posiada możliwość sterowania dwoma silnikami krokowymi.
Ściągnąłem również bibliotekę do arduino z tej strony: https://learn.adafruit.com/adafruit-mot ... pper-class
Jest tam opisane jak skonfigurować i podłączyć ten shield do silników krokowych serw i silników dc tyle że w pisaniu kodu do arduino jestem noga jak ma razie a tym bardziej by sterować tym przez bluetooth w androidzie i tu proszę o pomoc by pozmieniac ten kod co podałem w pierwszym poście dla silników krokowych za pomocą tych danych z powyższej strony.
-
Sławek
- Site Admin
- Posty: 14533
- Rejestracja: 21 gru 2011, 22:12
- Has thanked: 15 times
- Been thanked: 22 times
Re: sterowanie silnikami krokowymi przez bluetooth android/arduino
Faktycznie, jest tak napisane, ale jak widać kiepsko to działa 
Nie chce mi się wgryzać w kod i go analizować, poniżej masz kawałek kodu z tej biblioteki, wgraj i sprawdź czy działa :
Pozdr
Nie chce mi się wgryzać w kod i go analizować, poniżej masz kawałek kodu z tej biblioteki, wgraj i sprawdź czy działa :
Ew. zmień nr portu jakby nie działo (liczba 2) :// Adafruit Motor shield library
// copyright Adafruit Industries LLC, 2009
// this code is public domain, enjoy!
#include <AFMotor.h>
// Connect a stepper motor with 48 steps per revolution (7.5 degree)
// to motor port #2 (M3 and M4)
AF_Stepper motor(200, 2);
void setup() {
Serial.begin(9600); // set up Serial library at 9600 bps
Serial.println("Stepper test!");
motor.setSpeed(10); // 10 rpm
}
void loop() {
Serial.println("Single coil steps");
motor.step(100, FORWARD, SINGLE);
motor.step(100, BACKWARD, SINGLE);
Serial.println("Double coil steps");
motor.step(100, FORWARD, DOUBLE);
motor.step(100, BACKWARD, DOUBLE);
Serial.println("Interleave coil steps");
motor.step(100, FORWARD, INTERLEAVE);
motor.step(100, BACKWARD, INTERLEAVE);
Serial.println("Micrsostep steps");
motor.step(100, FORWARD, MICROSTEP);
motor.step(100, BACKWARD, MICROSTEP);
}
No i zakładam, że prawidłowo podłączyłeś silniki krokowe oraz dałeś dodatkowe zewnętrzne zasilanie bo to z arduino na pewno nie da rady// Connect a stepper motor with 48 steps per revolution (7.5 degree)
// to motor port #2 (M3 and M4)
AF_Stepper motor(200, 2);
Pozdr
-
jagus
- Kierowca
- Posty: 8
- Rejestracja: 28 sie 2016, 13:09
Re: sterowanie silnikami krokowymi przez bluetooth android/arduino
Ok dzięki kolego spróbuję to wgrać jak tylko będę w domu.
Zewnętrzne zasilanie dla silników mam z podłączeniem też nie ma problemu tylko z kodem dla mnie to troszkę czarna magia.
Zewnętrzne zasilanie dla silników mam z podłączeniem też nie ma problemu tylko z kodem dla mnie to troszkę czarna magia.
-
jagus
- Kierowca
- Posty: 8
- Rejestracja: 28 sie 2016, 13:09
Re: sterowanie silnikami krokowymi przez bluetooth android/arduino
Twój powyższy kod działa teraz jak go przerobić pod tą aplikację na androida by dało się sterować po bluetooth??
-
Sławek
- Site Admin
- Posty: 14533
- Rejestracja: 21 gru 2011, 22:12
- Has thanked: 15 times
- Been thanked: 22 times
Re: sterowanie silnikami krokowymi przez bluetooth android/arduino
Potrzebujesz modul bluetooth hc-06 i kod do obslugi po stronie arduino, natomiast nie wiem jaka masz apke na androida.
-
Fallen
- Kierowca
- Posty: 420
- Rejestracja: 20 wrz 2012, 07:34
Re: sterowanie silnikami krokowymi przez bluetooth android/arduino
Telefonem z androidem chce kolega sterować
-
Sławek
- Site Admin
- Posty: 14533
- Rejestracja: 21 gru 2011, 22:12
- Has thanked: 15 times
- Been thanked: 22 times
Re: sterowanie silnikami krokowymi przez bluetooth android/arduino
Pytam o aplikacje na androida no sam telefon nie wystarczy
-
barman_pl

- Moderator
- Posty: 9778
- Rejestracja: 04 lip 2012, 19:24
- Has thanked: 4 times
- Been thanked: 8 times
Re: sterowanie silnikami krokowymi przez bluetooth android/arduino
Taką ma 
https://play.google.com/store/apps/deta ... controller
Tylko tyle wychwyciłem z całego tematu
Pozdr.
https://play.google.com/store/apps/deta ... controller
Tylko tyle wychwyciłem z całego tematu
Pozdr.